Cute Easter Card

March 2020 sketch bunny H2O

The third week of every month is a sketch challenge!  It’s always a favorite challenge for me.  Here’s the link to the sketch and all twelve inspiration cards made by the design team:   Crazy4Challenges  

For some reason, I’ve been in a mood  to color and watch TV when I’m not working. So because Easter is right around the corner, I decided to start making a few Easter themed cards.  This adorable stamp by Pink & Main is called “Bunny Costume“.  Unfortunately it has been discontinued.  It’s too bad because it is one I pull out every year!

2018-02-13 16.12.33

The Steps:

Step 1:  Stamp something that will be the focus of the card.  Color and cut the image out.  I used Copic Markers.  I also stamped the Easter Eggs and the “chocolate Easter bunny” box.  After I colored them I fussy cut them out.  I applied clear Lacquer to the “bunny boxes”

Step 2:  I cut the image using Elizabeth Craft Designs: Stitched Nested Rectangles.

Step 3:  I cut the two yellow gingham 2″ squares using Elizabeth Craft Designs: Stitched Squares.  I hand cut the green and white polka dot rectangle.

Step 4:  My card is a 5.5″ square, so I made the base card by scoring an 11″ x 8.5″ piece of white cardstock at 5.5″.  Fold over for a tent fold and trim to a 5.5″ square..

Step 5: Adhere the yellow squares to the top front as in the sketch.  Adhere the green rectangle under the squares, and then the featured stamped rectangle on top, centered.  I then added some of the “fussy cut” bunny boxes and eggs as shown.  The two grass pieces I tucked them into were left overs from another project. Here’s another look:

March 2020 sketch bunny H2O

Thanks so much and don’t forget to hop over to the challenge and join in this week!


Color Blocking!

Color Blocking H2O

So I have to admit I wussed out this week!  I was going to use a different and way more ornate stamp set for this technique but the embossing was a mess.  So I chose instead a much simpler die set and the embossing worked well.  I also only made 4 color blocks!  The set I used is a stamp set from Elizabeth Craft Designs: Color My Easter Eggs stamp set

There are some great tutorial videos on this color blocking technique by Jennifer McGuire: Color Blocking by Jennifer McGuire

The Steps:

Step 1:  Cut a piece of white cardstock in a square that measures 5 x 5″.  Stamp the eggs with embossing ink and then use black embossing powder.

Step 2:  Cut the embossed square in half.  Then cut the two halves in half.  Now you should have four 2.5″ squares.  Color each square with a different color of ink and ink daubers.

Step 3:  Create a base card by scoring a 8.5″ x 11″ pc. of white cardstock at 5.5″.  Fold over for a tent fold.  Trim to 5.5 x 5.5″.

Step 4:  Now I taped with removable tape the two top squares together and centered them leaving a .25″ border at the top and two sides.  Then I did the same with the two bottom squares.

Step 5:  I finished off the card with “Happy Easter” peel off sticker and black border lines peel off stickers.  Both are from Elizabeth Craft Designs.

That’s it this first Sat. of September!

Here’s another quick look:

Color Blocking H2O

Thanks so much for stopping by.  If you haven’t tried this technique before, this is a great time to give it a try.

Other Product Used:

Michael’s Craft Store: White cardstock

Sticky Specs

Memento Stamp Pads

CutterPillar Pro

An Easy Easter Card

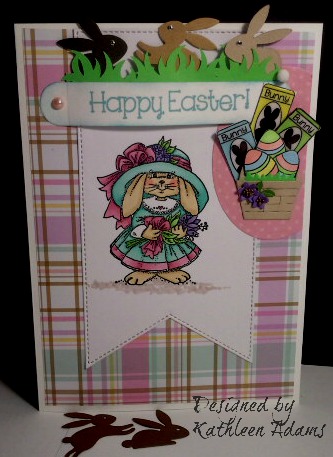
My Design Team Easter Card.


2018-02-14 C4C bunny sketch

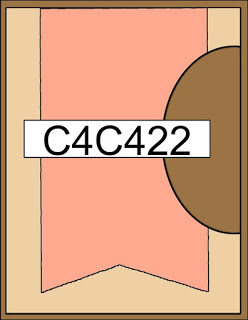
It’s sketch week over at Crazy4Challenges C4C-422

              C4C422 sketch      2018-02-14 C4C bunny sketch

You all know how much I love a sketch but I must admit this sketch stumped me.  It looks so easy but I couldn’t come up with an idea!  I am currently working on Easter so I wanted to use my favorite bunny stamp.  It’s from Art Impressions and is called Holiday 1-779.

2018-02-13 16.11.25

This is how I made this card.

Step 1:  Stamp on white cardstock using the above stamp.  Color with Copic Markers or Pencils.  I chose to color with copics.  (When you position the stamp give yourself about 3″ below the top of your cardstock.

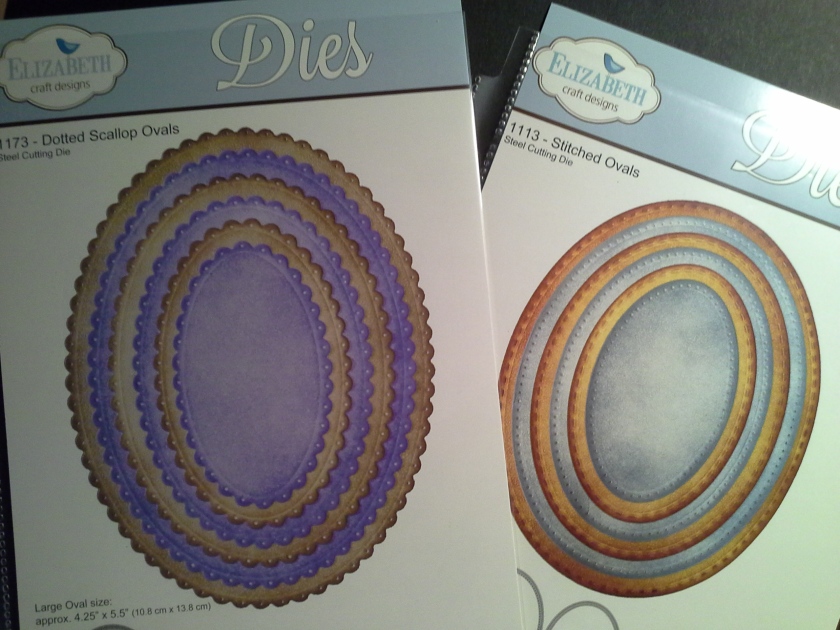
Step 2:  Cut the image with the largest die from this set.

2016-07-24 12.13.19

 This step is actually two steps because these nested fishtails are too short for what I needed to fit the sketch.  Position the die on your stamped and colored image where you want the “fish tail” (bottom) of the die to end below your stamped image. Run through your cutting machine but STOP before the top (straight edge) of the die cuts.  Now move the die up to where you want the top of the die to end.  In this case that was 2″ above the image.  Now run through your cutting machine again but stop before it cuts the fishtail again.  You should now have a longer fishtail then the die. Notice that I positioned the image closer to the left of the die to allow room for the half oval in the sketch.

Step 3:  Using the stamp set below from Pink and Main, stamp both the “egg” and the “Chocolate bunny box” 3 times.  Color how you want.  I added Crystal Lacquer to the bunny boxes like they were wrapped in cellophane. After the lacquer is dried, fussy cut all the bunny box and eggs.

2018-02-13 16.12.33

2018-02-12-21-01-20.jpg

Step 4:  From the little die set from Elizabeth Craft Designs below cut the pieces for the basket, flower and grass.  I used  scrap cardstock.  Assemble the basket. Add the grass, chocolate bunny boxes and eggs as show below.  Add Prills to the little flowers. I used leftover little leaves from one of Susan Tierney Cockburn’s 1196 – Garden edge rose  flower dies as shown below:

2018-02-13 22.37.592018-02-14 15.46.16


Step 5:  Using the same Pink and Main Stamp as in step 3, stamp Happy Easter on white cardstock.  Cut it with the long rectangle pictured below and distress the edges with Tim Holtz “peacock feathers” Distress Ink.

2017-06-11 20.39.21

Glue the grass Strip (which is a Silhouette file to the top of this sentiment strip.

Step 6: Cut the 3 bunnies from this die set below using 3 different brown colors.  I used scrap cardstock.  Add a glitter dot for eyes. Cut an oval with coordinating designer and the second to the largest die set pictured below.  Cut the oval in by first laying in place and making light pencil marks where one side should be cut off to make it line up with the mat’s edge as shown.

2017-03-13 17.11.09

2018-02-16 23.00.09


2018-02-14 C4C bunny sketch

Step7:  Assemble the card:

Score a pc. of 11 x 8.5″ white cardstock at 5.5″ on the long side.  Trim to 5  x 7″.  Cut two mats from designer cardstock that measures 4.75″ x 6.75″.  Adhere one to the card front and one to the back, centered leaving 1/8″ border all around.  Adhere the stamped fish tail to the front panel, centered with the top (Short straight edge) at the top of the designer paper mat.   Adhere, the now cut oval in place as shown.  Put 3 large foam dots under the sentiment tag by centering the one dot then adding one either side of the first.  Put the dots closer to the bottom then the top to make it possible to side the bunnies behind the grass.  Glue the two ends down.  Add a half dome pearl to cover the hole on the right and adhere the Easter basket as shown with the highest bunny box hiding the left side hole.

That’s It!

Thank you so much for your time to hop over for a look.  Please follow if you would like more tutorials.

Other Products used:

Elizabeth Craft Designs:  White Soft Finish cardstock 8.5 x 11″, Glitter Dots

Beacons Kid’s choice glue

Sizzix Big Shot Plus


Dies R Us – Kids Cards!

Combine stamping and Die cutting to make adorable cards.

I decided to enter the current challenge at Dies R Us which is “Kids Cards”.

2018-01-16 DiesRus

The image I chose for this challenge is one called “Peaceful Easter” from The Paper Shelter.  I fell in love with this sweet image of innocence:

2018-01-15 16.46.56

The Steps:

Step 1:  Download, size and print the image.  If you’re new to digital stamps,  the greatest reference on many things about using digital images is from a website called Kit and Clowder.   This is a company that teaches coloring with Markers and Pencils.  They also have areas on their website that have an amazing amount of information on all things coloring!  The below photo shows how I always print out an image that I buy in both the black and white, and color version on one page that I keep in a binder.  It also has the image that I colored with PrismaColor Premium Pencils. 

2018-01-15 16.48.02

After I colored the stamped image I created the background with stencils and PanPastel’s then trimmed the finished image to 5 x 7″ with the stamped image centered:

2018-01-15 16.35.56

Step 2:  Cut 2 rectangle mats that measure 5 x 7″.  One from Designer cardstock and one from white cardstock.  From the Die set below on the right 1113 – Stitched Ovals, center the second to the largest on the Designer cardstock and run through your machine.  From the same die set, center the third to the largest on the white rectangle.  Save the Oval mats for another project because you will use the rectangle mats with the oval cut outs.

2016-11-26-17-11-25
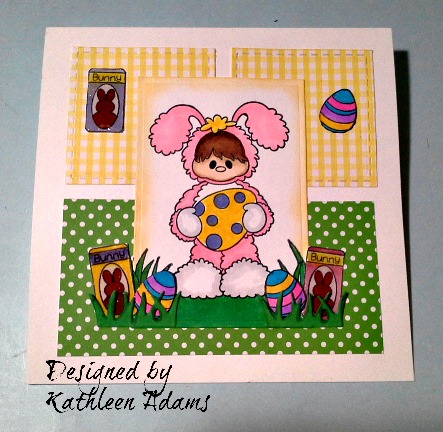
Step 3:  Adhere the white mat to this layer. Then, on top. the Designer layer.  The photo below is these 3 layers and the beginning of step 4:

2018-01-16 13.24.10

Step 4:  Cut from white cardstock and color with Copic Markers, all the decorator items as follows:

Peaceful Easter collage

Cut the grass, eggs, bunnies and fence once.  Cut all the Holly Hock pcs. to assemble the holly hock on your card directly and build the plant from the stem up as the picture in step 3.

Step 5:  Assemble the Holly Hock on the left as shown then add the fence, bunnies and eggs on the bottom.

Step 6:  Create a base card by scoring a 8.5 x 11″ at 5.5″ on the long side.  Fold and trim down to 5.5 x 7.5″.  Adhere the assembled front to the base.

That’s It!

Thanks so much for taking a look.  Please follow and leave a comment.  I love to read them and answer any questions.

Other Products Used:

Elizabeth Craft Designs:  White Soft Finish Cardstock White,  Clear Double sided adhesive 10mm

Beacons Kids Choice Glue

Sissix Big Shot Plus