Relaxing Bath

Bath frame close H2O

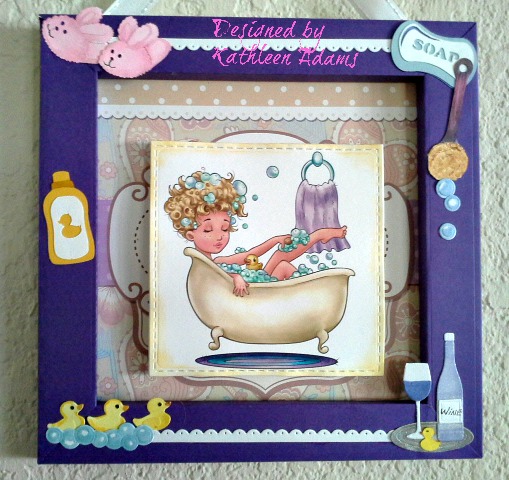
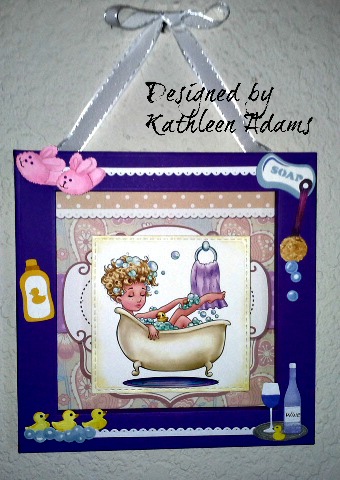
Well, while in California we have all been ordered to shelter in place, I have been having some fun making some wall hangings for family and friends using one of my all time favorite Digital Stamp store, The Paper Shelter’s adorable digital stamps.  This one is called:   Relaxing Bath

Bath wall H2O

First of all if you are not familiar with digital stamps, then let me tell you why I love them and use them more then traditional stamps.  When you buy an image you get the colored image, the black and white line image (to color yourself), a background with the featured image on it or you can choose to print out the feature image and the background separately, as I did for this project.  The average cost is around $3.00!  You don’t have to store them in your craft room because you store them on your computer.  You can also print them out in any size!  So let’s make some cute art to frame!

The Steps:

Step 1:  Print out the colored version of the background and the featured image that goes with it on white cardstock.  Cut the featured image out using a nested squares die set.  I used Elizabeth Craft Designs: 1118 – Stitched Squares

Step 2:  Make a frame using Elizabeth Craft Designs: Happy Frame XL.  I chose to use a purple cardstock for this step so that the bath accessories would stand out.  Here’s the link to the assembly video: Happy Frame Assembly video

Step 3:  I used some Karen Burniston’s die sets such as the little ducks, bubbles and wine set.  I used Silhouette files for the “slippers, soap, bath brush and yellow bottle of bubble bath.

Step 4:  Trim the background to the same size as the frame.  (if you measure 1″ from each side of the background and trim off the excess, then the printed background should be the exact size of the assembled frame (8″ square).  Add double sided adhesive to all four edges of the trimmed background and attach to the backside of the frame.

Step 5:  Add the bath accessories to the frame as shown.  I chose a white 5/8″ wide ribbon to hang the finished project with.  I tied a bow and left enough ribbon hanging from the bow to attach to the back at the length I felt would look good.  Tape the two hanging pcs. to the back of the project.  Then cut a 8″sq. of white cardstock and attach to the back of the project to cover the ends of the bow and make a clean backside.

Step 6:  On the back of the project I attached Elizabeth Craft Designs: Lace Pocket

Lace pocket

This step is optional, but this is where I wrote a little note about why I chose this particular image for this project for the recipient, but also some things I love about them.

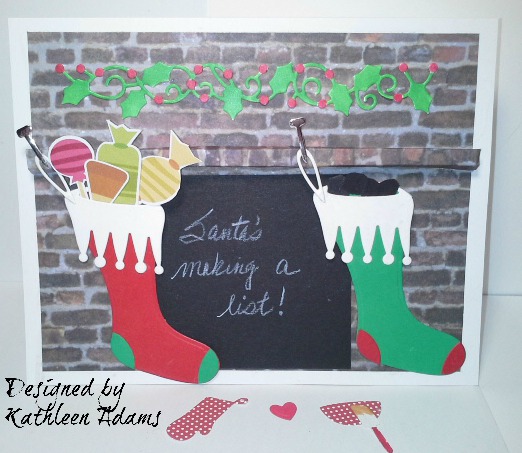
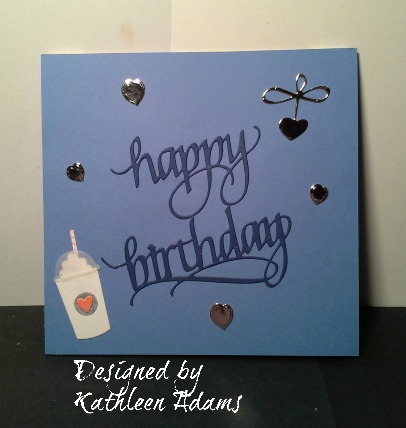
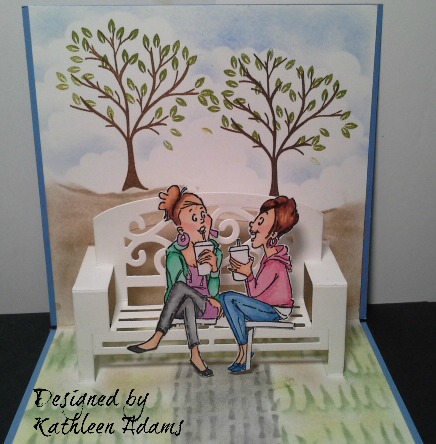
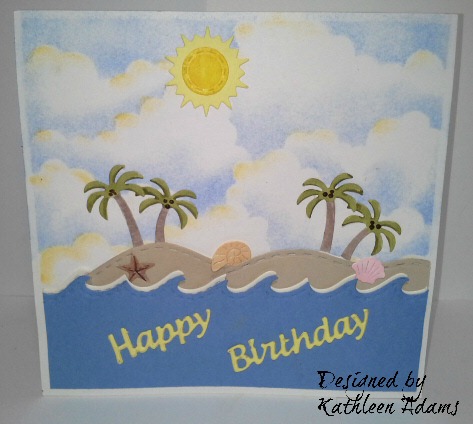
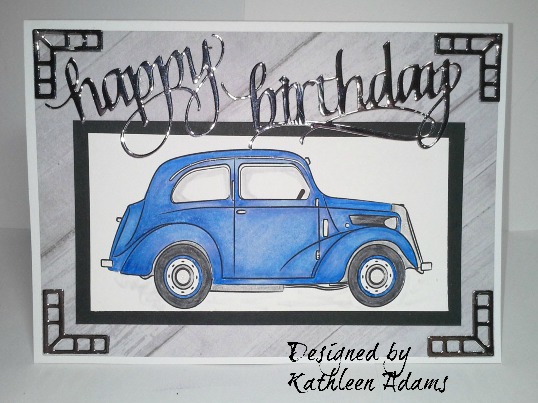
Here’s a few more I made:

I’ve made a total of 13 of these!

Thanks so much for taking a look and I hope you are staying safe and finding some fun projects to make if you are also “sheltering in place”.  And I hope you’ll experiment with digitals!

Other Products Used:

Michael’s Craft Store:  All cardstock

Amazon:  10mm double sided adhesive

Elmer’s Craft Bond

Cutterpillar Pro

Sizzix Big Shot Pro


Easy All Occasion Card!

Kite Front H2O

This week over at: Crazy4Challenges  I am the hostess, and found on the “Calendar of Days” that today is “Kite Flying” day!  So for this Saturday  Feb. 8th. the challenge is to put a kite on your card.  If you don’t have a kite then you can put anything else that flies on your card.  Or,….You can make a kite to put on your card like I did.

The Steps:

Step 1:  Cut a rectangle that measures 5.5″ x 7″ from white cardstock.  Next I used a stencil from Elizabeth Craft Designs called “Clouds and Grass” to stencil this background panel with PanPastels.

Step 2:  I made the kite by cutting a rectangle from Coral cardstock that measures 2″ x 3″.  Then I folded on the diagonal long side.  Then cut the shape of the kite.  Then fold across the kite.  Below shows the toothpicks I glued on the underside:

Kite under tooth

Step 3:  Cut out a 1″ x 6″  grass edge for the bottom of card with Elizabeth Craft Designs: Nature Edges.  The clouds are from an older Karen Burniston die set called: The All Season Tree.

Step 4:  Make a base card by scoring an 8.5″ x 11″ pc. of cardstock at 5..5″ and then folding for a book fold and trimming to 5″ x 7″.  Now adhere the cloud stenciled layer to the front of the base card.  Adhere the grass edge to the bottom of the card.  Then decide how you want the clouds and Kite.  I added a little foam dot under the clouds and top half of the kite.  Then I added a pc. of white bakers twine to make the kite tail.  Then just cut scraps of colored cardstock in tiny triangles and glued them on either side of the twine.

Kite close up

Step 5:  I chose the stamped sentiment from an older one from Karen Burniston “flying by to say” because I could make a few and stash them for almost any occasion by just adding the appropriate sentiment on the inside.  Thanks so much for taking a quick look:

Kite Front H2O

That’s It!

Other Products Used:

Michael’s Craft Store:  All cardstock

CutterPillarPro

Amazon:  PH Neutral PVA Glue


Make Lemonade!

Lemonade H2O         


This week over at:  Crazy4Challenges  It’s Sketch Week!  I love to be inspired by a good sketch.  I bought this stamp set from It’s Cheaper Than Therapy several years ago. It’s called Lemonade2Drink

Lemonade Stamp set

The Steps:

Step 1:  Stamp the glass and Ice cubes on white cardstock any way you like.  Then cut to 3.5″ x 5″.  Color with Copic Markers.  Cut a rectangle from black cardstock that measures 3.75″ x 5.25″ and adhere the “lemonade glass” to this black mat.

Step 2:  Stamp the full circle “lemon slice” on white cardstock and also color with Copic Markers.  Next cut it out.

Step 3:  Make a base card from a green print cardstock by scoring an 8.5 x 11″ piece at 5.5″ and fold as a book fold.

Step 4: I created the two sentiments in Word on my computer.  Then cut them with my Cutterpillar Pro to 3/4″ wide and left the length at about 4″ until I assembled the card.  I did mark the center with a pencil dot and then manually cut the “fishtail ends”.  I also colored the edges of the sentiment tags with the same Copic marker (Y08)

Step 5:  Next assemble the components onto the front of your base card as shown and then cut the ends of the two “fishtail” sentiments even with the edge of the card.

That’s it!  Don’t you love an easy and quick card?

Thanks so much for taking a look!  I can’t wait to see what you do with this month’s sketch!  Here’s another quick look:

Lemonade H2O

Other Products Used:

Michael’s Craft Store:  All cardstock

PH Neutral PVA Glue


Try Something New!

Little one H2O best (2)

I have had this one piece die since it first came out but just checked and it has been discontinued.  It was called 1064 – Fitted Frames 4 – Curvy Squares also from Elizabeth Craft Designs. Because of it’s name,  I always used the eight frames as frames!  But for this challenge, I cut the one piece out of white cardstock and then colored each frame and used them all on this card as a background die!  So this is a new technique for me even though I’ve had the die a long time.2018-05-01 16.57.43

After I colored each of the frames, I made a base card by scoring an 8.5 x 11″ piece of white cardstock at 5.5″ and folded over for a tent fold. Then I glued all the frames back together onto the front of the base card leaving an eighth of an inch border all around.

I added Glitter Dots in all the holes also from Elizabeth Craft Designs.  As soon as I had it together it really looked like a “baby card” background.  So that’s what I made.

The “Bunny”  and “Onesy” are from a Karen Burniston’s Baby Charms.  The sentiment tag was first stamped with a Karen Burniston Stamp set and cut with a Sizzix Tag die.

That’s It!

Other Products Used:

Sizzix Big Shot Plus

Cutterpillar Pro

Copic Markers

Michael’s Craft Store:  All cardstock

Kid’s Choice Glue

Put Candy on it Challenge

Santas list H2O

Yep, this week over at: Crazy4Challenges  According to the days of the week calendar, jit’s National Candy Day !  So this week is to put some candy on your project!  I am working on Christmas cards, so I made this card to look like a fireplace with “Naughty or Nice”  stockings hung up.

The Steps:

Step 1:  I began this project by cutting out the pieces of an, apparently, discontinued die set from Elizabeth Craft Designs that was called: 932 – Stocking Solid.  I used Green, red and white cardstock and assembled as shown.

Step 2:  Make a base card by scoring an 11″ x 8.5″ piece of white cardstock at 5.5″ along the longer side.  Fold over for a tent fold and trim to 5.5″ by 7″.

Step 3:  Cut a rectangle from designer paper that looks like brick and measures 5″ x 6.5″.  Adhere it to the base front.  Next, cut a strip from the same paper that measures 1″ x 7″.  Score 3 times at .25″, .50″ and .75″ all the way across this strip.  Now fold on the score lines to create what I hoped looks like a mantel to hang the stockings.

Step 4:  Cut a square that measures 3″ x 3″ from black cardstock.  Adhere it to the card centered as shown.  Now adhere the mantel from step 3 above the black square.

Step 5:  I used another discontinued Elizabeth Craft Designs die set called 932 – Holly Border.

Step 6:  The candy in the red stocking are Silhouette print and cut files.  I had cut from black cardstock, the “coal” for the green stocking.  Then I used a white Prismacolor pencil to write “Santa’s Making a List”.  Here’s another quick look:

Santas list H2O


That’s It!

Thanks so much for stopping by!

Other Products Used:

Michael’s Craft Store:  All cardstock and designer paper

Beacon’s kids choice glue

Sixxix Big Shot Plus

Put A Drink On It!

Drinks H2O

Drinks inside H2O (2)

According to our Hostess, Frances Byrne, it’s Beer Drinking Day!  The challenge this week is to put some kind of a drink on your card.  I made this card for my best friend, Jeanine, who is also my boss at the beauty salon I’ve worked at for the last 16yrs.  Our birthdays are 2 days apart!  She is 10yrs. younger than me however!  I just love her and we often spend our lunch hour picking up fast food and spending the hour chatting and laughing.

The Steps:

Step 1:  I made the pop up inside the card first.  I used an older die set from Karen Burniston called 780 – Garden Bench.  I like to try to use currently available products but this bench worked so well with the Art Impression’s stamp of these two ladies.  4407 – Coffee BFF’s

Step 2:  The card is a 6″x6″ square. I cut two 5.75″ x 5.75″ squares from white cardstock.  I stamped one with the tree from this stamp set I bought from:Amazon link to stamp set

Tree stamp

I have purchased several sets from this seller on Amazon.  They all have not disappointed me.  The seller is GIMITSUI.  They don’t spend on fancy packaging and the buyer benefits.  This set is priced at $6.59  They are a Prime Member store and offer free shipping and free returns!  What!  I know!  You will not want to return them.  All of the stamp sets I have purchased from them stamp very well.  Here are two more sets that I adore and have already used.

You may remember the elephant set used on another C4C Sketch Challenge:

Aug sketch Elephant H2O (2)

Then I used PanPastels to stencil the clouds and hills behind the bench.  The other 6″ square I also used PanPastels and stencils for the grass and path: Snow storm and Clouds & Mountain and Split rail Fence

Drinks inside H2O (2)

Next I trimmed them to fit behind and around the bench.  Wait to adhere these two stenciled squares until later.

Step 3: I stamped the Art Impression BFF’s stamp.  I colored them with Copic Markers and fussy cut them out.  I glued them to the front of the bench just on the back side of their legs which makes them really look like they’re sitting on that bench!  I’ve had the AI stamp for awhile and have used them a lot.  But I really believe I saw Frances use this stamp exactly like this when the Garden Bench first came out.

Step 4: Cut two 6″ squares from a sky blue cardstock for the front and back of the pop up.  Now take a scrap of white cardstock that is about 2″ x 4″ and stencil this strip to continue the hills behind the bench.  Do the same thing for under the bench.   Adhere the strip that is for behind the bench to the bottom of a blue square. (Make sure it is positioned to fill in where the bench cut out is).  Do the same thing for the piece that is attached to the path/grass layer and adhere it to what will be the back of the card.

Step 5:  I used 3 die sets for the front of the card: 1434 Calligraphic Elements – 3

1161 – happy birthday  and Coffee Charms.  I cut the “Elements” from silver mirror cardstock.  I cut coffee cup with white cardstock and colored with Copic Markers.  I cut the top from Velum. The happy birthday is from dark blue cardstock.  Adhere them all to the front of the card as shown:

Drinks H2O

Adhere the other blue square to the back of the card and it’s done!  I can’t wait to see what you make this week!

Other Products use:

Beacon’s Kids Choice Glue

CutterPillar Pro

Michael’s Craft Store:  All cardstock

Sizzix Big Shot Pro


A lesson learned!

 Sept sketch H2O

It’s sketch week!

It’s also my birthday today!  I love sketch week because your card can be any theme.  So I made mine a birthday card.

I always will post projects I like, but also my “not so much” projects.  This one I really thought would end up cute.  I had some designer paper with all these pastries on it.  I thought it would be perfect to use with the dies I wanted for the four squares in this sketch.  However, once I saw it all together, I think it’s too busy and the paper competes with the feature “squares”.  So it just goes to show you, that even when you think you got this, it’s that one that will teach you a lesson!

The Steps:

Step 1:  The designer paper stripes measure 2″ x 7″.  The blue stripe is 1.5″ x 7″.

Step 2:  I used Elizabeth Craft Designs: 1118 – Stitched Squares  for the four squares.  Using the second to smallest die, cut four times from white cardstock.  Then I used a little yellow Panpastel to match the yellow in the paper.  It doesn’t look yellow in the photo because it’s pretty pale yellow.

Step 3:  I used two Karen Burniston Charm die sets for the squares:

1050 – Sweet Treats Charms        and         1041 – Coffee Charms

Sweet Treats Charms                                  Coffee Charms

I cut all of the dies I used from white cardstock and colored them with Copic Markers.

The Yellow Happy Birthday sentiment is Elizabeth Craft Designs: 783 – Happy Birthday

Step 4:  The base card measures 5.5″ x 7″.  Score an 11″ x 8.5″ pc. of paper at 5.5 on the long side.  Fold over for a book fold.  Then add all the elements in steps 1, 2 and 3 to the front of the base as shown.  Here’s another look at the card:

Sept sketch H2O

That’s it!

Thanks so much for stopping by and we can’t wait to see what you do with this sketch!

Other Products Used:

Beacon’s Kids choice glue

Michael’s Craft Store: White and blue cardstock

Sizzix Big Shot Plus

CutterPillar Pro

Sticky Specs


National Sandcastle Day

Front seaside H2O

Inside seaside H2O

It’s a new month and a new Hostess who is Nicky Foden.  Because today is Sandcastle Day, Nicky has challenged us to put a sandcastle, sand or any beach theme.  One of my favorite die sets is Karen Burniston’s Adirondack Chair Pop Up.  The one I own is one she designed when she was with Elizabeth Craft Designs.   She has revisited this set at her new site:  https://karenburniston.com/adirondack-chair-pop-up/

The Steps:

Step 1:  Karen has an assembly video for this die set.  Click on the link above and you will find two videos.  One is for the original look of the Adirondack and a second one to make the chair look upholstered!  So the first thing I do for a pop up card, is to master the pop mechanism.  No worries, this one is easy!  I cut the “chair” pop up from white base weight cardstock or 80lb.  I use a heavy cardstock because I assume it’s going to be opened a closed a lot!

Step 2:  My base card is a 5.75″ square when folded.  This is the card that you will cut the chair into the fold.  Depending on what you will use for inside mats you may want to cut the two mats with the chair.  I chose for the bottom (under the chair” side) I measured  where I needed to out sort of a square under the chair.  And then to cover that hole when I attached the “sand” mat, I just adhered the same color cardstock under the chair and adhered the larger mat on top.  Both the “sky” layer or as I’m calling mats, measure 5.5″ square.

Step 3:  Cut two 5.5″ squares from white cardstock.  Using Elizabeth Craft Designs: “Earth and Sky”   I stenciled clouds with Aqua Marine Blue PanPastel.  Adhere this sky background mat to the top inside of the base card. The second one you will use on the front of the card.

Step 4:  Using Karen Burniston’s1038 – Tropical Scene

Tropical Scene

I cut the “waves” in white and blue for both the bottom inside and the front of the card.  I also cut the “Palm tree/sand dunes and “sea shells” and “sun” from this same set above.  I cut the little sand mound pc. twice. Once with the light brown cardstock and once with white cardstock.  I colored the little palm trees with Copic Markers.  Then I cut them off and adhered them to the light brown one right over the light brown trees.

Note:  This is a personal endorsement.  I do not receive any income from this company in either currency or products.  I have always felt that Karen almost always,  includes little decorator dies that you can use for so many projects with or without the die set they come with.  I’ve used these little sea shells and sun a lot.  For this project I used them on the front, inside, and in the bucket on the inside.

Step 5:  The two “Palm Trees” and “Pail” on the inside is from a discontinued die set from Karen B. that is called:  Palm Tree & Pail”.  I love this palm tree.

Palm Tree and Pail

Step 6:  Now just adhere all your cut and/or colored as shown on the inside and the front.  (I also created a personal sentiment on my computer and printed out on white cardstock.  I cut it out with a nested die set set and adhered it to the bottom of the inside of the card centered on the lower inside over the “wave section”.  I took the pictures before I added it to the card because it has the “receiver’s name on it.”  I don’t have her permission to post it on the internet.  Here’s another quick look:

Inside seaside H2O

Side view seaside

Front seaside H2O

Thanks so much for taking a look!  I know you’re time is precious.   Here’s the link to the challenge blog to see the rest of the design team’s cards for inspiration.  We can’t wait to see yours!  Crazy 4 Challenges

Other Products Used:

Michael’s Craft Store:  All cardstock

Sizzix Big Shot Plus

CutterPillar Pro

Elizabeth Craft Designs:  Clear Double Sided Adhesive 10mm

Beacon’s Kid’s Choice Glue

Make it Masculine!

Blue Classic Ford H2O

This last Saturday of July, our hostess Karen O. has challenged us to make a masculine card.  I purchased a digital stamp of this drawing of a Classic Ford, popular in the 40’s quite some time ago before I was blogging.  Therefore, I have no idea who the artist is.  I work 3 days a week in a beauty salon inside of an upscale senior community.  It is truly a blessing to work with my parents generation.  My parents both died young, so I appreciate their wisdom and humor so much.  This car would have been quite the car in the prime of their lives.  I thought this would be a card I could give to one of the “boys” that live there.

The Steps:

Step 1:  I sized and printed out the car on white cardstock.and colored with Copic markers B21, B23 and B24.

Step 2:  The finished card measures 5 x 7″, so score a piece of 8.5 x 11 at 5.5″ on the long side.  Fold over for a tent fold card and trim to the finished size.  Cut a rectangle piece of wood look cardstock that measures 6.75″ x 4.75″.  Adhere it to the front of the white base card.

Step 3:  Cut a rectangle from black cardstock that measures 5.75″ x  3″.  Cut the colored printed car to a rectangle that measures 5.25 x 2 and 5 eights.  Adhere this to the black one centered.

Step 4:  Using Elizabeth Craft Designs: happy birthday, cut once with silver mirror cardstock.  Using Elizabeth Craft Designs: Corners cut 4 also from silver cardstock.

Step 5:  Adhere the “silver corners” to the corners of the wood look background.  Adhere the step 3 mounted “car” to the card at .5″ from the bottom and sides of the wood background.  Then add the “happy birthday” as shown.  Here’s another look:

Blue Classic Ford H2O

Thanks so much for stopping by for a look.This is an easy challenge, so I hope you will show us your masculine card!  Your cards inspire us!

Other Products Used:

Michael”s Craft Store:  All cardstock.

Elizabeth Craft Designs:  Clear double sided Adhesive 10mm

Wink of Stella: silver for the metal on the car.

Sizzix Big Shot Plus

CutterPillar